One of the great draws of Microsoft Dynamics AX is that the user interface feels familiar. I think we can all agree that the end user has a better chance of adapting the new technology when this is the case. The users might even appreciate the software more when things feel built especially for them. Fortunately, in Microsoft Dynamics AX, you can customize essentially any grid with field headers (forms, journal lines, inquiries, etc.) to add additional information the user is accustomed to having when completing their daily tasks. Creating a new personalization is very easy to implement and could greatly benefit the end user as they go through their daily processes.
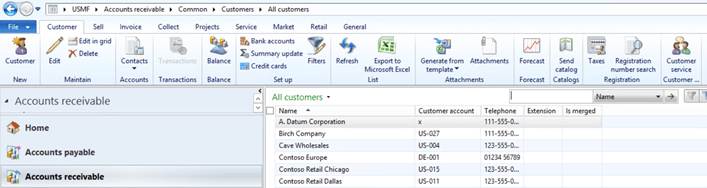
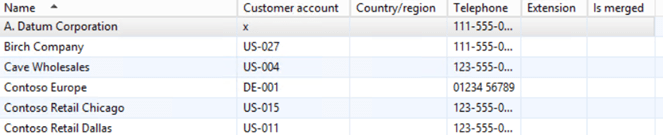
To start, I will demonstrate how to create a personalization. A common place to put a personalization is on the customer list form (address in screenshot below). This is the information that the form displays out-of-the-box.
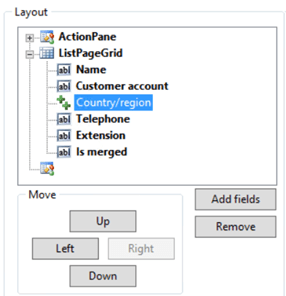
To create a personalization, right click in the field and click Personalize. This will open up the screen below.
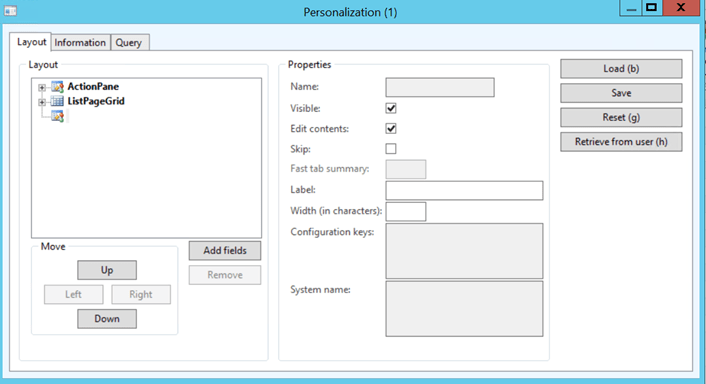
If you click the + symbol next to ListPageGrid, it will expand to show the field headers currently in the form. In order to add additional fields to this form, click the Add fields button.

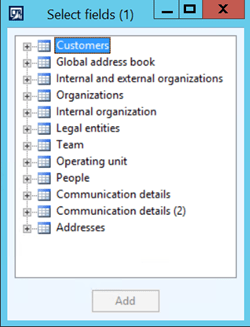
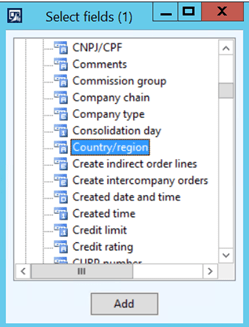
This will bring up a list of tables associated with this form (customer list). You can click the + symbol again to open up and see the individual fields available to add to the form. In this example, I chose the Country/region field and clicked ‘Add’ to bring it into the form. Close out of this form, when you are finished.
The Country/region field is now in the grid. You can drag this field around to determine what column it would fit in best.
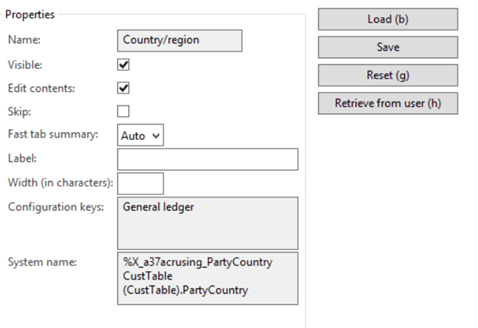
In the properties section, the Width field, you can determine the maximum length of characters for that field. You can also click the checkbox next to Visible in case you wanted to hide that field. Click the Save button in order to save the personalization for other users. Give the personalization a unique name and click OK. Now, close out of this screen. Note: In order for a different user to use this personalization, click the Retrieve from user button, find the user that originally created the personalization and double click the saved personalization.
Important! You must go to another screen (such as the Accounts receivable area page) in order for the personalization to load correctly. Once you leave the form and then go back in, your personalization will appear.
There is some good news and bad news when it comes to utilizing the personalization functionality in AX. The bad news first, each personalization is specific to each legal entity. So, if you need the personalization for each legal entity, then it must be created in each legal entity and retrieved by every user that requires it. The good news, the personalization only needs to be retrieved/created once! It will stay there each time you enter AX (unless it is changed by the user).

Leave a comment